There is a small square in the bottom-right corner of every selected cell in Excel. Most people ignore it. The people who do not ignore it finish their spreadsheets in half the time.
That square is called the fill handle, and it is one of the fastest ways to handle repetitive tasks in Excel. One click, one drag, done. No endless typing, no macros, no complicated functions to memorise. Whether you are copying a formula down 500 rows or filling dates for an entire year, the fill handle can do it in seconds.
In this guide, you will learn what the fill handle is, where to find it, and how to use it for formulas, series, and custom patterns. You will also see how an AI-powered approach can take over when you want to skip the manual dragging altogether. Let's get into it.
What Is the Fill Handle in Excel?
The fill handle is a small square that appears in the bottom-right corner of any selected cell or range in Excel. When you hover your mouse over it, the cursor changes from the usual white arrow into a thin black plus sign. That plus sign is your signal that you can click and drag to fill nearby cells automatically.
You may hear it called by different names depending on who is teaching Excel. Some people call it the fill pointer, others refer to it as the AutoFill handle or the fill handle tool. They all mean the same thing: the tiny square that helps you complete repetitive tasks faster.
What makes the fill handle in Excel so useful is its ability to recognise and continue patterns. Select a cell containing the number 1, drag the fill handle downward, and Excel copies the value as 1, 1, 1, 1. Select two cells containing 1 and 2, drag again, and Excel recognises the sequence, continuing it as 3, 4, 5, 6, and so on.
The fill handle also works with dates, formulas, days of the week, months, and even custom lists. In many cases, Excel can predict what you want before you finish dragging.
You can use the fill handle in Excel for Windows, Excel for Mac, and Excel for the web. The appearance may vary slightly between versions, such as a green square in newer versions and a black one in older releases, but the functionality remains the same.
How to Use the Fill Handle in Excel (5 Methods)
Before you can use the fill handle, you need to know where to find it. Click any cell in your spreadsheet and look at the bottom-right corner of the selection. That tiny square is the fill handle in Excel.
Hover your mouse over it and the cursor changes into a thin black plus sign. That is your cue to start filling.
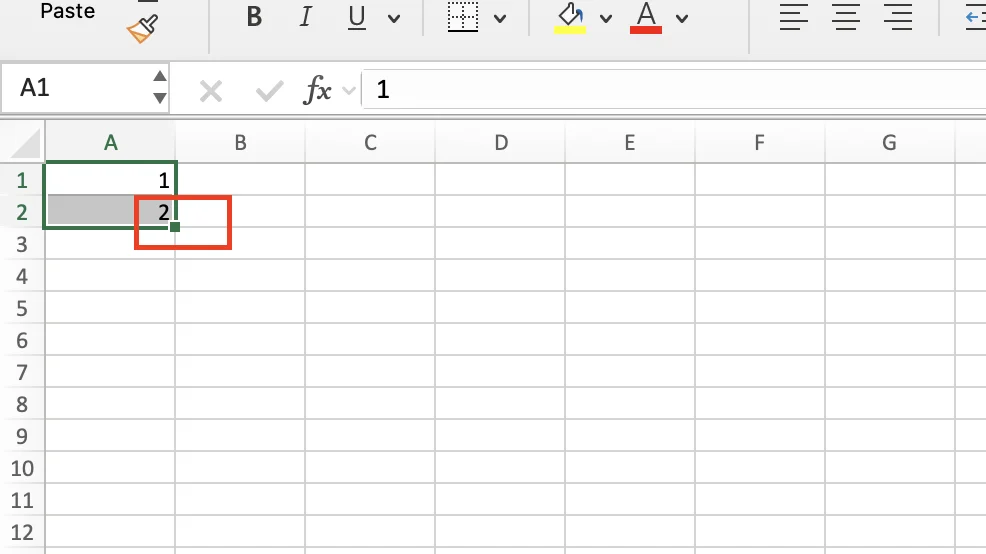
The fill handle has five main jobs, and each one handles a different type of spreadsheet task. Here is how each one works.
The fill handle has several practical uses, and each one helps speed up a different type of spreadsheet task. Here is how the main methods work.
Method 1: Copy the Same Value Across Cells
This is the most basic use of the fill handle. You enter a value once and quickly repeat it across multiple cells without copying and pasting.
- Type a value into a cell (for example, "Paid" in cell B2).
- Click the cell to select it.
- Move your cursor to the fill handle in the bottom-right corner.
- Click and drag downward to B10.
- Release the mouse button.
Excel fills every cell from B3 to B10 with the same value: "Paid."
This method works for text, numbers, formulas, and even formatting.
Best for: status columns, repeating labels, approval tags, and marking rows with the same category.
Method 2: Extend a Number or Date Series
The fill handle becomes especially useful when you need to create a sequence. Instead of manually typing 1, 2, 3, 4 all the way down to 100, you can give Excel a pattern and let it continue the series automatically.
Create a Number Series
- Type 1 in cell A1 and 2 in cell A2.
- Select both cells (A1:A2).
- Grab the fill handle in the bottom-right corner of the selection.
- Drag downward to A10.
Excel recognises the pattern and automatically fills the remaining cells with 3, 4, 5, 6, 7, 8, 9, 10.
The key is selecting two cells first. If you select only one number, Excel usually copies the same value instead of continuing the sequence.
Two values give Excel enough information to detect the pattern.
Create a Date Series:
The same idea works with dates.
- Type a date into cell A1 (for example, 01/01/2026).
- Select the cell.
- Drag the fill handle downward.
Excel automatically fills the following dates in order: 02/01/2026, 03/01/2026, and so on.
It also works with months and weekdays. For example:
- Jan extends into Feb, Mar, Apr
- Monday extends into Tuesday, Wednesday, Thursday
Excel recognises many built-in patterns automatically, which makes scheduling and reporting much faster.
Best for: numbered lists, invoice numbers, daily schedules, monthly reports, timelines, and weekday planning.
Method 3: Copy a Formula Down a Column
Copying formulas down a column is one of the most powerful uses of the fill handle. You write the formula once, drag it down, and Excel automatically updates the references for every row.
Imagine you have a sales spreadsheet with quantities in column A and prices in column B. You want to calculate total revenue in column C.
- In cell C2, type
=A2*B2and press Enter. - Click cell C2 to select it.
- Move your cursor to the fill handle in the bottom-right corner.
- Click and drag downward to C100 (or however far your dataset goes).
Excel automatically adjusts the formula for each row:
- C3 becomes
=A3*B3 - C4 becomes
=A4*B4 - C5 becomes
=A5*B5…and so on.
You only write the formula once, and Excel applies the same logic to the rest of the column automatically.
Pro Tip: Double-Click Instead of Dragging
If your dataset is long, you do not need to drag manually.
Double-click the fill handle instead, and Excel automatically fills the formula down to the last row of adjacent data. This is much faster than scrolling through hundreds or thousands of rows.
A quick note on references: If your formula uses a fixed value (like a tax rate in cell E1), lock it with dollar signs: =A2B2$E$1. The dollar signs tell Excel to keep E1 the same when you drag, instead of shifting to E2, E3, and so on.
Best for: revenue calculations, percentage formulas, IF statements, VLOOKUPs, SUMIF formulas, and any situation where the same calculation needs to be repeated across many rows.
Method 4: Fill a Custom Pattern (Months, Quarters, Weekdays)
The fill handle does more than copy numbers and dates. Excel can also recognise built-in patterns such as months, weekdays, quarters, and text labels that include numbers.
Fill Months Automatically:
Type January into cell A1, select the cell, and drag the fill handle downward. Excel automatically continues the sequence with February, March, April, and so on through the year. It also works with abbreviated month names:
- Jan becomes Feb, Mar, Apr
- Sept continues to Oct, Nov, Dec
If you keep dragging past December, Excel loops back to January and continues the cycle.
Fill Weekdays:
The same feature works for weekdays.
Type Monday into a cell and drag the fill handle downward. Excel fills in:
- Tuesday
- Wednesday
- Thursday
- Friday
You can also use shortened versions such as Mon, Tue, and Wed.
Fill Quarter Sequences:
Type Q1 in A1 and Q2 in A2. Select both cells and drag. Excel fills Q3, Q4, Q5, Q6, and onward.
The two-cell trick from Method 2 applies here too. One cell gives Excel nothing to learn from.
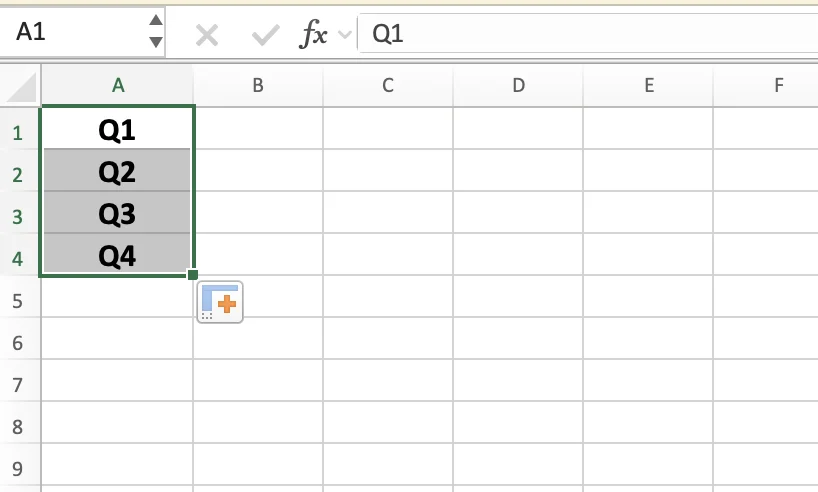
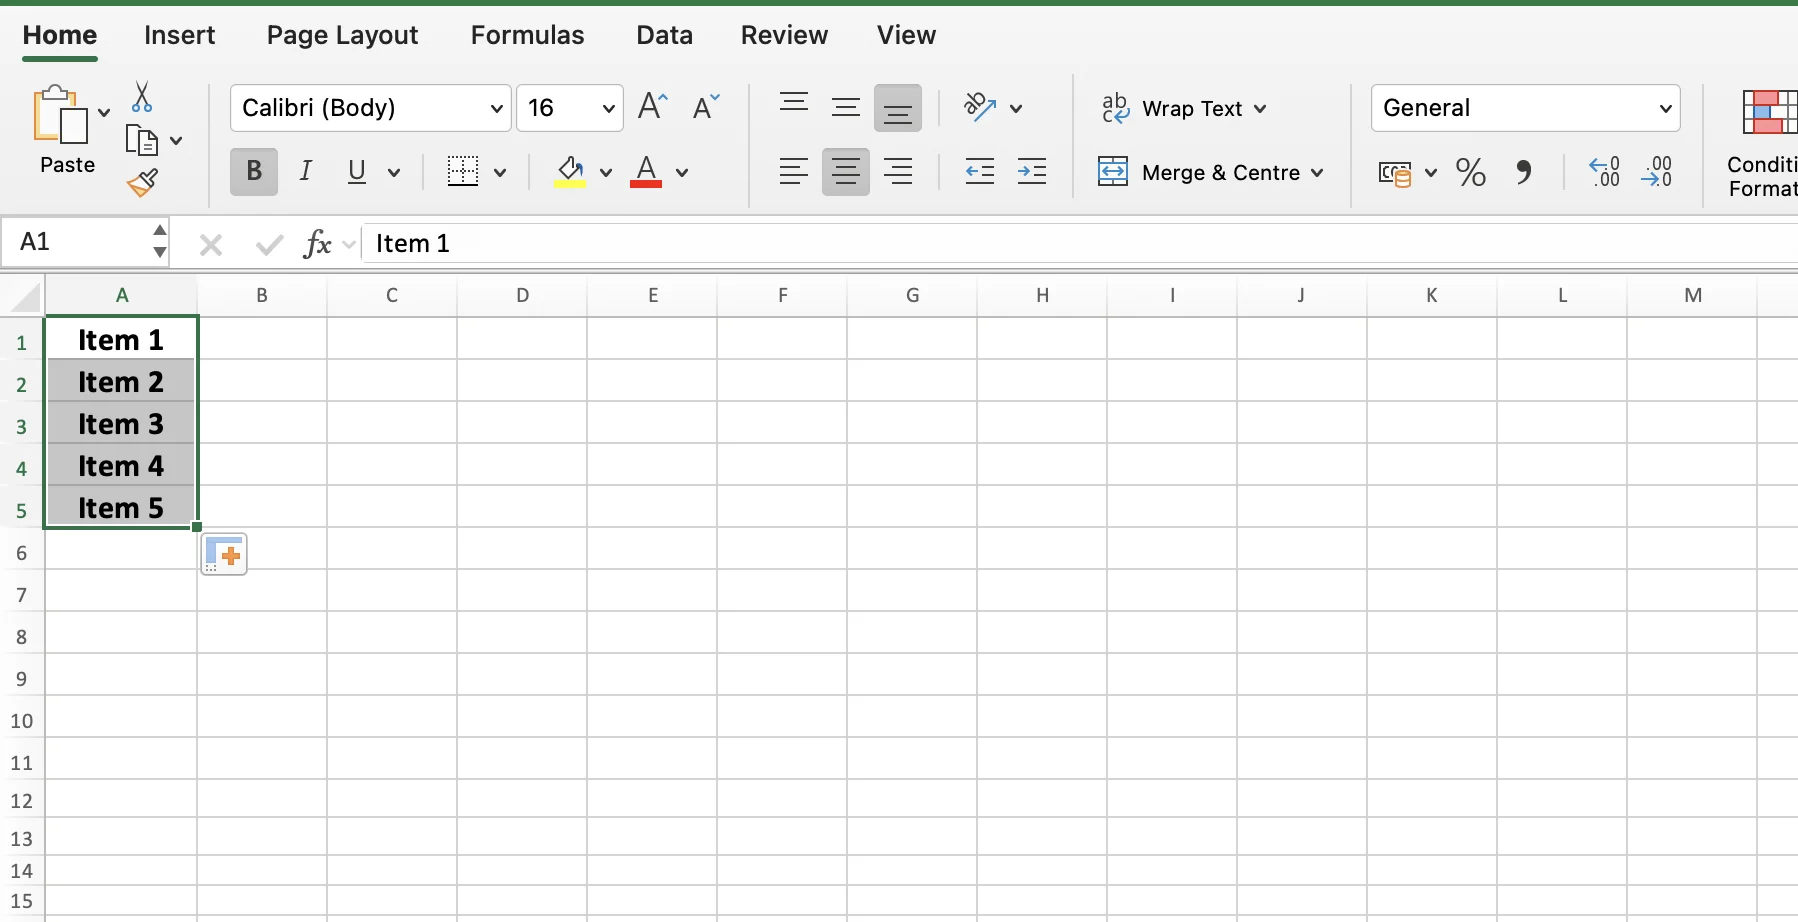
Fill Custom Text + Number Patterns
Patterns like Item 1 and Item 2 work the same way. Select both, drag, and you get Item 3, Item 4, Item 5. Useful for invoice numbers, product codes, team labels.
Hidden Trick: Use Ctrl to Copy Instead of Extend
By default, Excel tries to continue a recognised pattern. But if you want to copy the exact same value instead, hold the Ctrl key while dragging.
For example:
- Dragging Monday normally creates Tuesday, Wednesday, Thursday
- Dragging while holding Ctrl creates Monday, Monday, Monday
This gives you more control over how Excel handles the fill operation.
Best for: calendar templates, quarterly reports, recurring schedules, invoice numbering, and any repeating label with a predictable pattern.
Method 5: Skip the Drag with GPT for Excel AI Agent

Methods 1 through 4 cover the predictable work. Numbers in order, dates in sequence, formulas copied down, quarters and weekdays.
But real-world spreadsheets are rarely that simple.
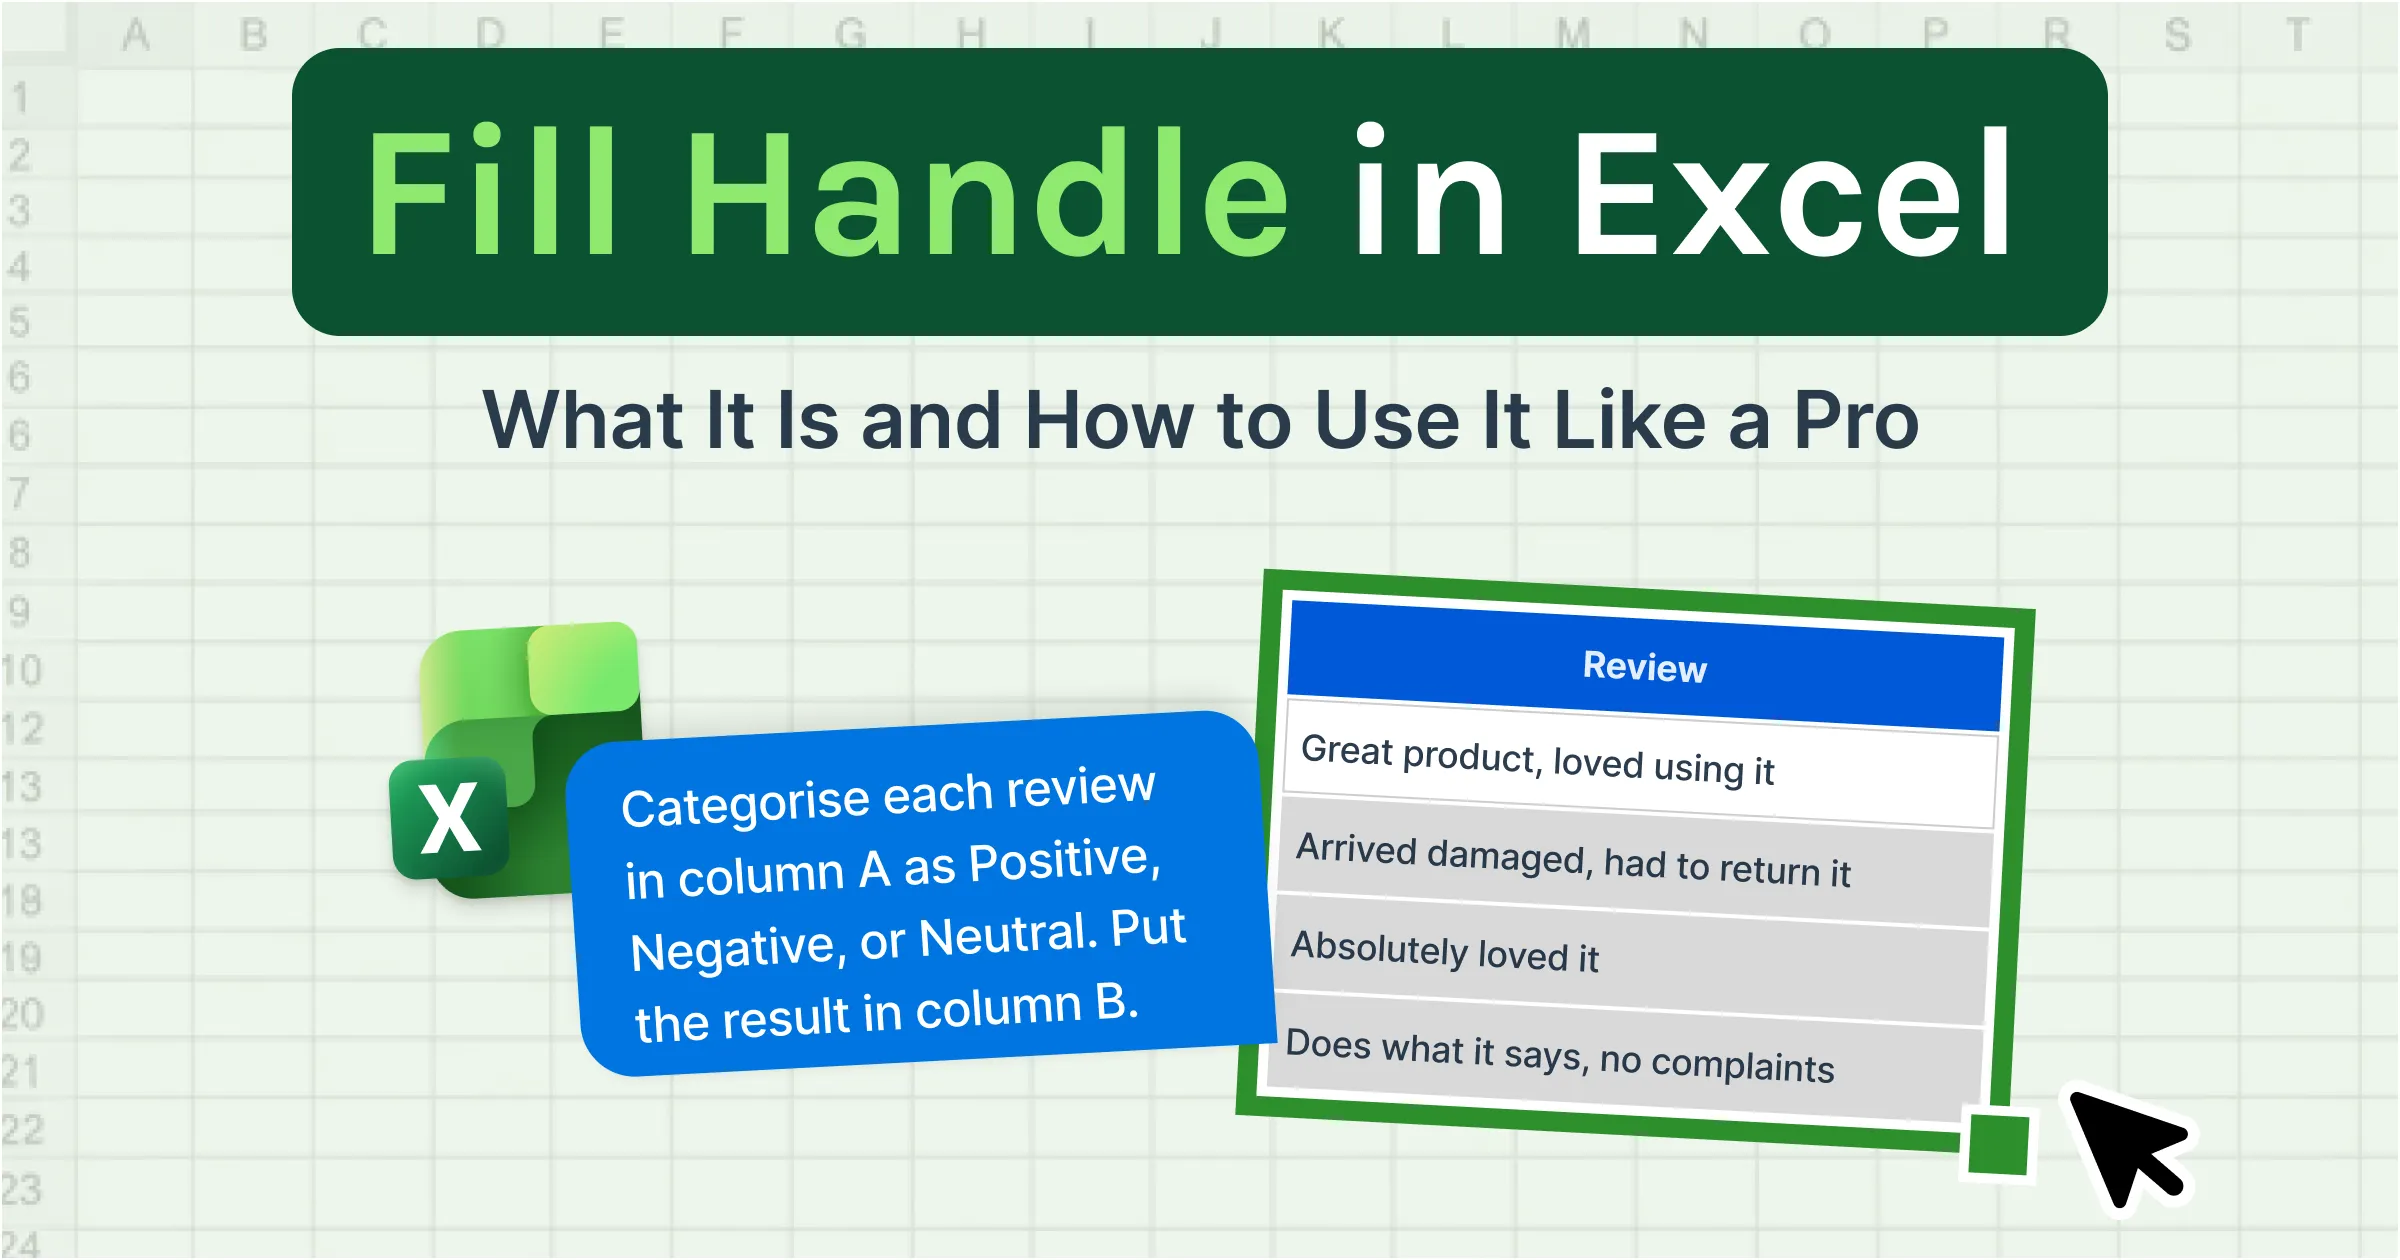
What if column A contains 2,000 customer reviews that need to be tagged as Positive, Negative, or Neutral? What if you need to translate a product catalog from English to Spanish, or identify the industry for a list of company names?
The fill handle cannot help with tasks like these because it extends patterns, not meaning. It can repeat logic, but it cannot understand the data inside your cells.
GPT for Excel by GPT for Work takes a different approach. It is an AI agent that sits inside your Excel sidebar. Instead of dragging a formula, you describe what you want in plain English and it applies the changes across your entire sheet.
Example prompt:
"Categorise each review in column A as Positive, Negative, or Neutral. Put the result in column B."
That is the entire workflow. The agent reads every row, classifies it, and fills column B for all 2,000 rows at once.
But this agent does a lot more than fill cells.
The same sidebar can pull website and industry details for 2,000 company names from the web, rewrite 500 product titles to fit SEO limits, tag 10,000 support tickets by urgency, or translate thousands of product descriptions into another language.
Best for: Categorising, translating, summarising, enriching, cleaning, tagging, and any spreadsheet task where the traditional fill handle reaches its limits.
Which Method Should You Use?
Here is a quick way to decide which method fits your job.
Scenario | Best Method |
|---|---|
Repeat the same value down a column | Method 1: Copy Value |
Number or date sequence (1, 2, 3 or daily dates) | Method 2: Number or Date Series |
Apply one formula to every row | Method 3: Copy Formula |
Months, quarters, weekdays, or custom text + number patterns | Method 4: Custom Pattern |
Categorise, clean, translate, or enrich data that needs actual thinking | Method 5: GPT for Excel |
For most spreadsheet jobs, Methods 1 through 4 will cover you.
The fill handle is built to handle predictable patterns, and that is what these four methods do best.
The 5th Method is there for the jobs the fill handle cannot reach. Categorisation, translation, data cleanup, anything that needs understanding rather than repetition.
Fill Handle Options: The Auto Fill Menu Explained
After you drag the fill handle, a small icon appears in the bottom-right corner of the filled range. This is the Auto Fill Options button, and most Excel users never notice it.
Click the icon, and Excel gives you several ways to change how the fill was applied.
Here are the most common options:
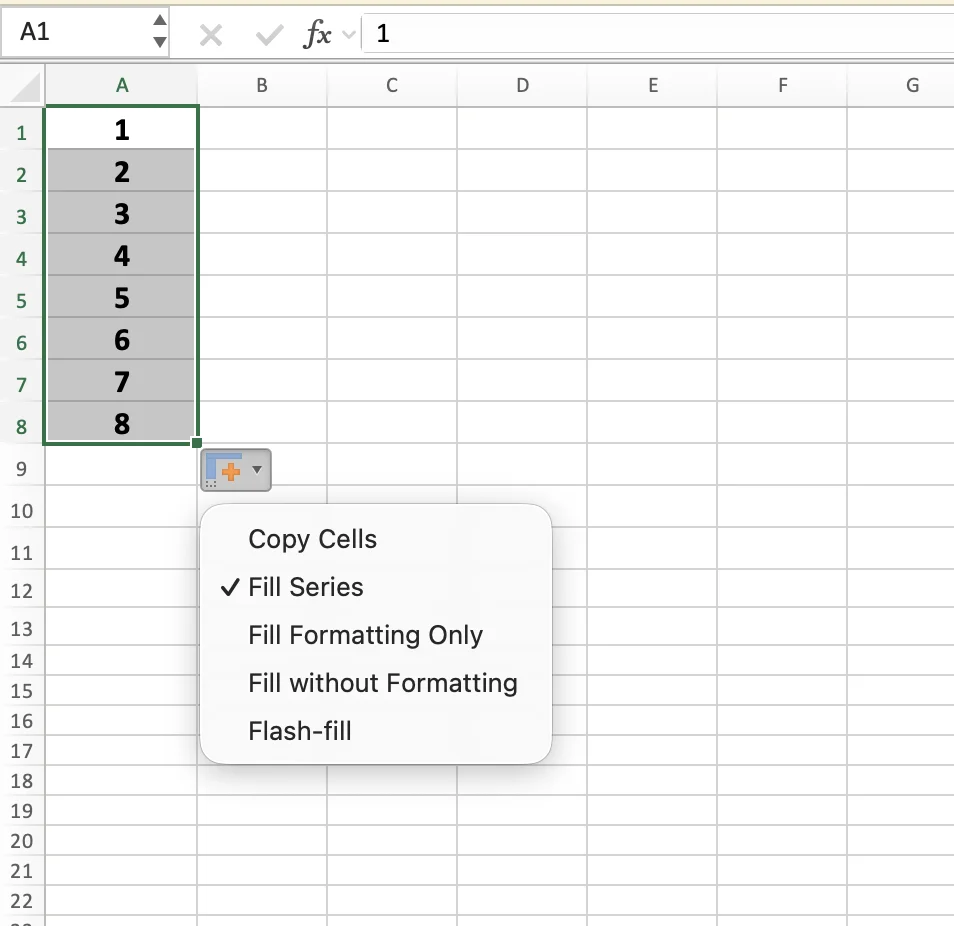
- Copy Cells: Repeats the selected value exactly as it is, without extending any pattern
- Fill Series: Forces Excel to continue a sequence, such as numbers, dates, or months
- Fill Formatting Only: Copies colours, borders, fonts, and formatting without changing the cell values
- Fill Without Formatting: Copies the values or formulas but leaves the original formatting behind
- Flash Fill: Uses Excel's pattern-recognition feature to automatically complete text-based patterns
The options you see depend on the type of data you dragged.
For example:
- Dragging a number usually shows Fill Series
- Dragging a formula may not, because formulas already adjust automatically
- Dragging formatted cells often includes formatting-related options
This menu is especially useful when Excel guesses wrong.
If Excel copied values when you wanted a sequence, or extended a pattern when you only wanted duplicates, you do not need to undo the action and start over. Just click the Auto Fill Options button and switch to the correct behaviour instantly.
It is one of the fastest ways to fix mistakes without redoing your work.
Flash Fill: When You Want Excel to Guess the Pattern
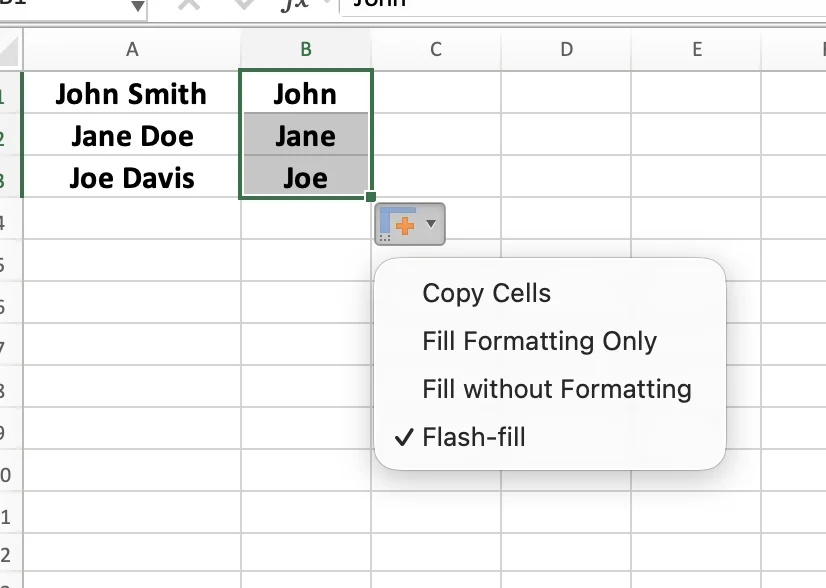
Flash Fill is worth calling out on its own. It watches the first example you type and guesses the pattern for the rest of the column.
Say you have full names in column A ("John Smith," "Jane Doe") and you want first names in column B. Type John in B2. Start typing Jane in B3, and Excel will offer to fill the remaining names for you in grey preview text. Press Enter to accept.
Trigger it manually with Ctrl + E (Windows) or Cmd + E (Mac). Great for splitting names, extracting email usernames, formatting phone numbers, or cleaning up text without writing a formula.
Wrapping Up
The fill handle is a small feature that saves a lot of time. Master it once, and repetitive spreadsheet work shrinks from hours to seconds. That is the real win.
When your job moves past patterns and into judgement calls, GPT for Excel by GPT for Work is built for exactly that. Install it, write your request in plain English, and let the AI agent handle the parts a drag cannot.
FAQs
What does the fill handle look like in Excel?
It looks like a small green or black square at the bottom-right corner of any selected cell. Hover your mouse over it and the cursor changes to a thin black plus sign.
What does clicking and dragging the fill handle do?
Clicking and dragging the fill handle tells Excel to read the pattern in your selected cells and extend it as far as you drag. It copies values, continues number or date sequences, and updates formula references automatically.
Why is my fill handle not working?
Your Excel settings have it turned off. Go to File > Options > Advanced (or Excel > Preferences > Edit on Mac), check "Enable fill handle and cell drag-and-drop," and click OK.
Is the fill handle available in Excel Online and Excel for Mac?
Yes, it works in both. The behaviour is identical across Excel for Windows, Mac, and the web, with only small visual differences.